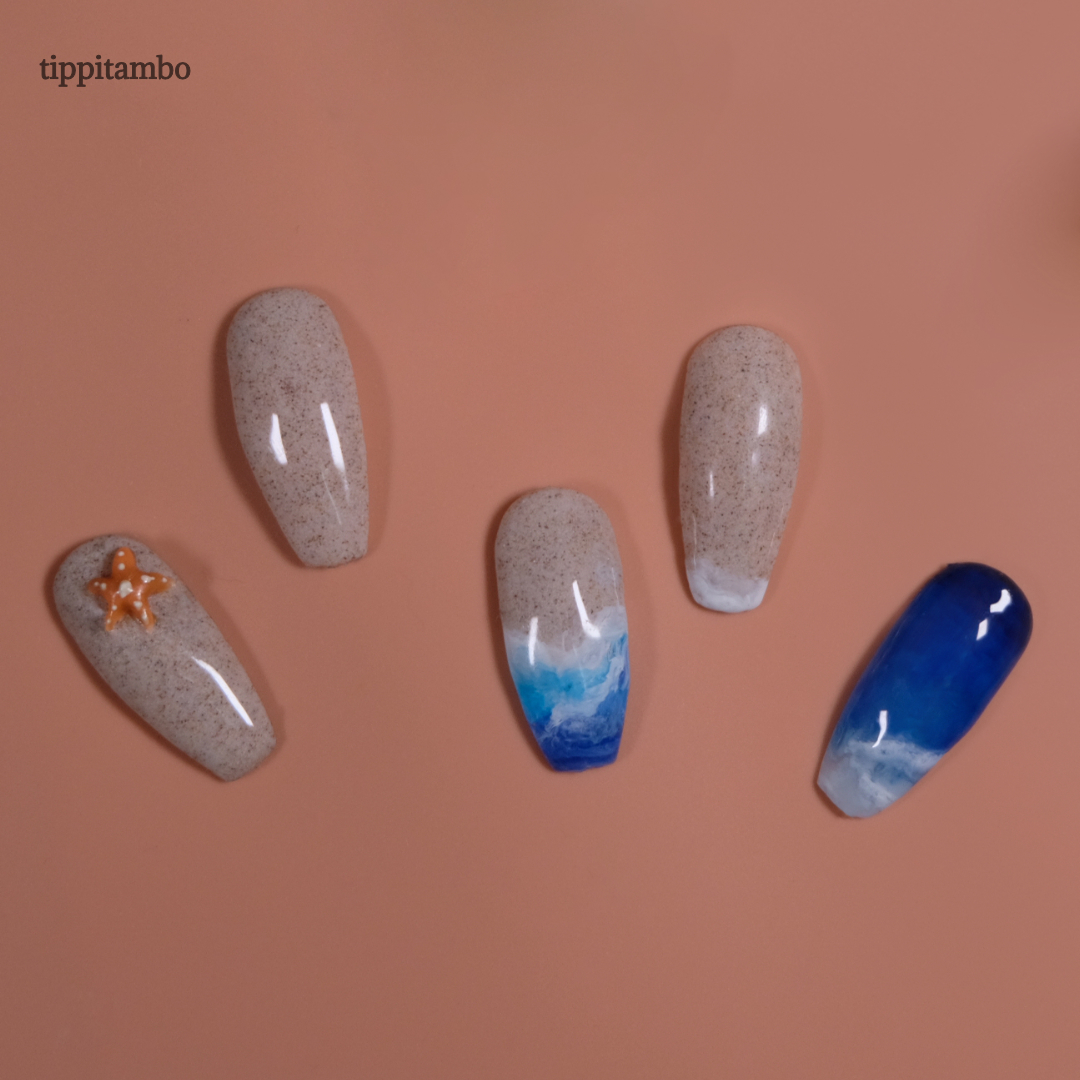
The nail art tutorial below is for the single waves nail design in the above set. Before you begin, don’t forget to prepare your nail surface before you begin with a DIY nail cleanser!
")
Instructions
Step 1

- Apply base coat and cure.
- Apply brown sand gel over full nail and cure. Reapply brown sand until opaque and cure
Step 2

- Apply clear gel to nail. Do not cure.
- Apply a strip of dark blue gel at the tip and then a strip of light blue gel below the dark blue gel. Do not cure.
- With the liner brush, apply a thin curved strip of white gel under the dark blue gel and under the light blue gel. Do not cure.
Step 3

- Lightly dab in the white strip between the blue gels (and the sand a blue gels) in a slightly curved direction.
- With some of the white gel still on the liner brush, lightly include some of the white gel in the blue gels to give a foam look. Starting off, it would initially look like the image below. Continue to blend the colors until it looks like the final step below.
- Leave gel on nail for a few seconds to self-level (or until smooth).
- Cure.
Step 4
")
- Apply shiny top coat.
- Cure.
Tips & Tricks
The Beach Day set stands out for a number of reasons – the sand effect, the 3D marine life, and the sense of motion from the illusion of waves rushing to the sandy shoreline. This tutorial will focus on the latter. Let’s take a look at how a basic nail art marbling technique can be used to create this wave effect.
For the nail art marbling technique, clear gel would be your best friend. There are many types of clear gels, so you should ideally use those that are labeled as mixing gel. If you’re unsure, stay away from gels used to structure the nails or top coats. Builder gels, which are used to structure nail extensions, tend to be very viscous. You would need a clear gel that does not have this thick consistency. It should be more fluid and easy to move around (but not too fluid that it’s difficult to control!).
This beach nail art was actually highlighted in one of our featured essays on how to develop and execute unique nail design concepts. Download the template to follow along from concept creation to nail art!

